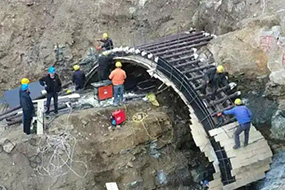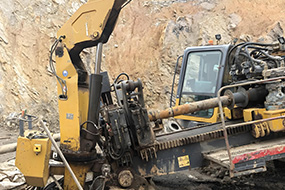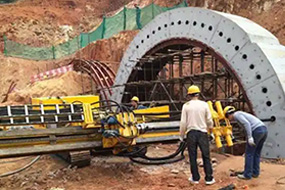
The 7-step installation checklist for a Yibin Machinery anchor drill pipe starts in the lay-down yard, not at the drill rig. Every delivered pipe must be matched against the project specification: outer diameter, wall thickness, thread type, and coupling torque rating. Most contractors skip this step because all pipes look identical until the stamped batch code is checked. That code is the only link to the mill certificate that documents yield strength and heat treatment. Install a lower-grade pipe in a permanent soil nail wall and the failure will not appear during installation—it appears years later when the design load exceeds the actual pipe capacity. Always verify the batch code on every bundle before the first section is lowered into the borehole.
A freshly drilled borehole looks clean, but fines and cuttings settle at the bottom within seconds. Contractors commonly skip the compressed-air blow-out because it feels like wasted time, yet the soft layer it removes sits directly under the grout column and reduces the bond between the grout and the ground. After blowing the hole from the bottom upward, verify the depth using the anchor drill pipe itself. Fix a tape mark at the design length, lower the pipe until it touches the hole bottom, and compare the mark against the collar reference. This 30-second check prevents the most common cause of short-embedment anchors—a depth that the driller assumed but never confirmed.
Torque readings are unreliable when threads are dry or the connection is not fully seated. Apply a thin coat of thread compound to the male threads and spin the coupling by hand until it stops. This hand-seating rule is non-negotiable, applying equally to Self Drilling Anchor Bolt, Anchor drill pipe, anchor drill rod, and standard hollow bar assemblies. When a power chuck drives the final seating, cross-threading can go unnoticed while the torque wrench shows the target value, leaving the connection with zero actual preload. Before the installation wrench is attached, confirm that the coupling face is flush with the pipe shoulder. This single action prevents the majority of field connection failures.
The most common installation mistake is rotating the anchor drill pipe directly to the final torque value in one smooth motion. The correct sequence requires three stages—30 percent, 70 percent, and 100 percent of the final torque—with a short reverse rotation between the second and third stages. The reverse turn aligns the thread flanks and removes the localized stress concentration that forms at the thread root during initial make-up. Contractors who experience coupling cracking or thread galling during tensioning are usually the same ones who never staged their torque application. The three-stage sequence adds only seconds to each anchor but dramatically extends the fatigue life of the connection.
Grout defects are invisible because the pipe is underground, which is why this step is so often rushed. The most serious error is lifting the tremie line above the grout head during withdrawal; the grout column breaks and leaves a continuous air void around the anchor drill pipe. Keep the tremie submerged and control the injection rate so that grout displaces water gently rather than entraining air. Once grout returns to the collar, tap the exposed pipe end with a steel bar and listen. A clear metallic ring signals a fully grouted column, while a dull thud indicates a void that requires remedial injection. This three-second audible check is the cheapest quality control method on the entire checklist.
The final two steps in the 7-step checklist happen after the grout reaches initial set, which is why they are the most commonly skipped. Step six is the tension hold test: apply the specified pull-test tension, maintain it for 30 seconds, and measure the residual displacement. Step seven is the field record: log the anchor location, pipe batch number, final torque, grout volume, and pull-test displacement on a one-page form. Without this form, the completed Yibin Machinery anchor drill pipe installation has no technical or contractual evidence trail. The checklist exists to turn invisible subsurface quality into visible, verifiable project accountability—and that is a standard no contractor can afford to ignore.